 Categories
Online Audio Spaces Update: New Features for Virtual Event Organizers
It’s been about 8 weeks since we launched High Fidelity’s new audio spaces in beta. We really appreciate all the support, particularly if you have ...
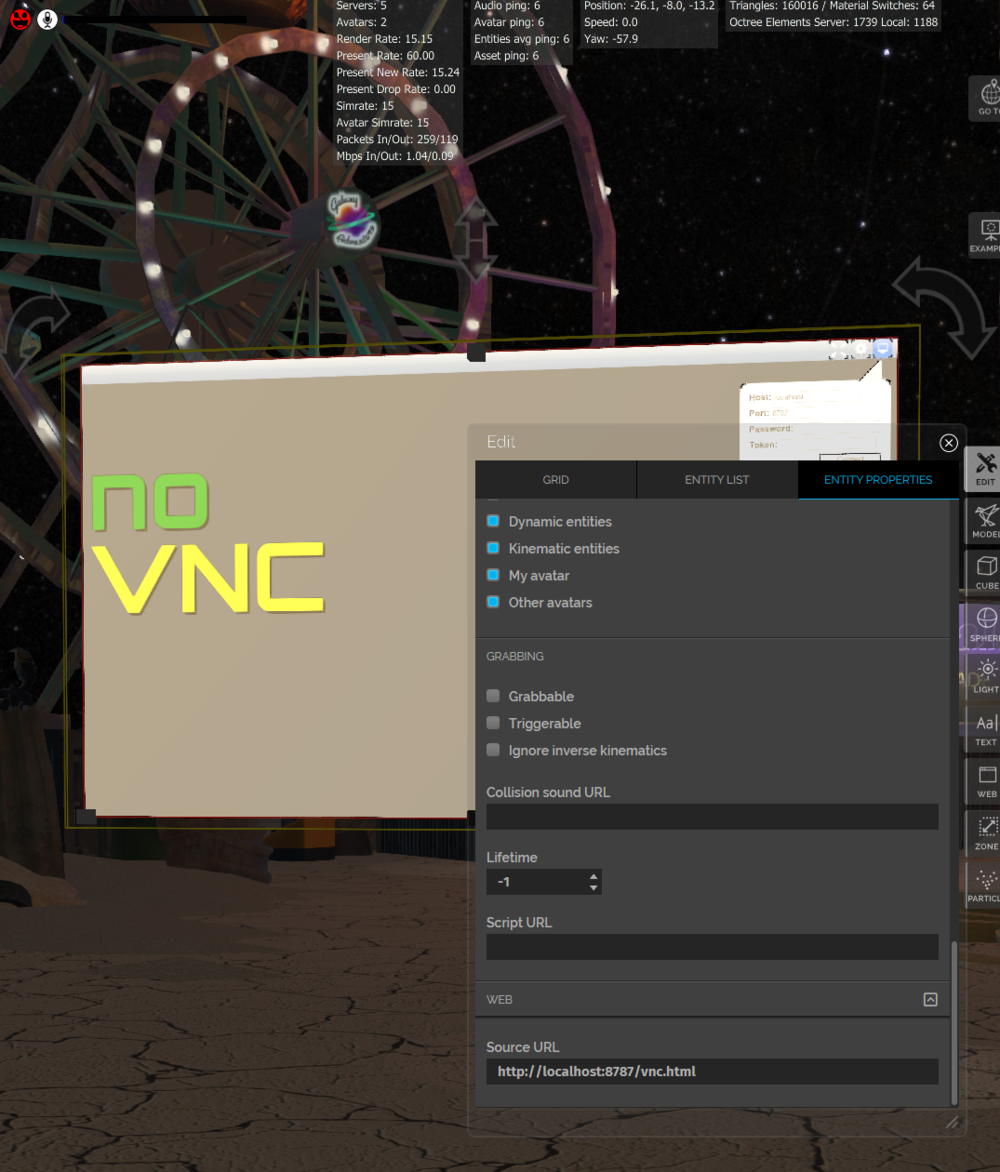
WHAT: We load an HTML5-based VNC viewer into a web entity in the virtual world. It communicates over a websockets proxy layer with a VNC server running on my machine. Anyone with the IP address and the password can view or, with permission, interact.
One of my favorite use cases for VNC is for remote research stations, like the Keck Observatory or Polar Bears International, where multiple people need to access far away systems. Collaboration is hard; collaboration across the world is even harder! But what if you could stand in a familiar, built space with your co-investigators? What if you could observe, design, and respond together? How would that change the way you worked? Keep notes on a whiteboard; point at part of the screen to explain what you mean.
Whether you’re an arctic explorer or a systems administrator, chances are you’ve used a VNC server. If you’ve ever wanted to surround yourself with screens and set up the ultimate Star Trek bridge to monitor your traffic, or if you simply forgot a file on your work computer, today’s your lucky day!
There’s some great stand alone software out there exploring this space, like Virtual Desktop or BigScreen. Below, I’ll show how to use High Fidelity to add this experience to a shared multi-user environment. Oh, and did I mention we’re open-source and free?
While there are definitely a few kinks to work out, without any coding you can be up and running in no time at all. We hope that you will share your ideas, concepts, and experiments in this space.
You can reach me at james@highfidelity.io with any questions, comments, or corrections. Thanks!
Note: This tutorial was created on Windows 10, 64-bit. The general steps should work on other platforms, but I haven’t tested them. I’ll update this post with any submissions from our Linux / OS X users.
Additional Note: I use a two monitor setup here: one for Interface, and the other for the ‘remote’ desktop.
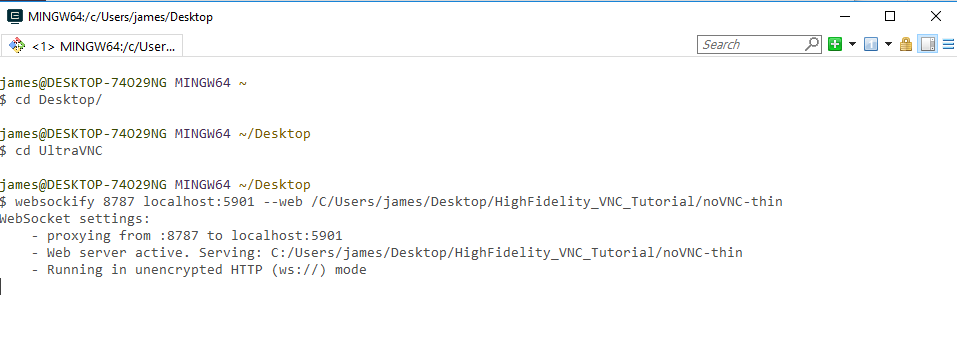
TLDR: Desktop Window → VNC Server → Websockify Running on Node.js → VNC Client from Web Entity inside of Interface

*Note — this is what held me up for a while: trying to get websockify to run via the instructions in their repository with python, I always ran into errors I couldn’t resolve. However, the node.js version works great!
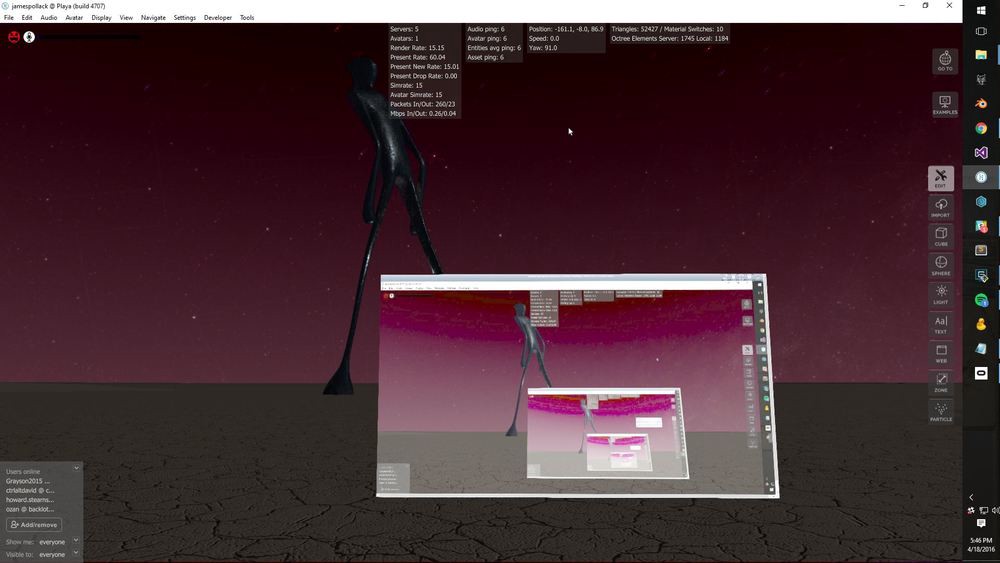
Now you should see your desktop window! Woohoo!
If you want others on the internet to be able to see your desktop, you need to set the sourceURL of the Web Entity to your public IP address. If your public IP address doesn’t directly map to where you’re serving the noVNC files, you’ll need to open up those ports yourself.
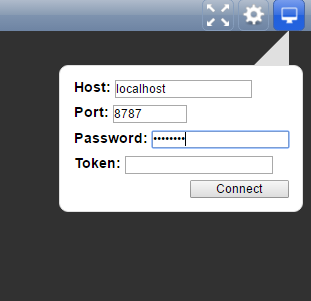
Note: others will still have to type the password to see your desktop, so you’re not broadcasting it just anyone!
We’ve only just scratched the surface of what’s possible. There are a variety of settings for both the VNC server and client that can be used to improve your individual experience. Furthermore, you could connect to a virtual desktop that isn’t running on your own machine, but rather in the cloud on a service like Amazon’s EC2. Open multiple connections for multiple desktops; figure out how to stream sound; give tutorials! Go for it.
Related Article:
.jpg)
It’s been about 8 weeks since we launched High Fidelity’s new audio spaces in beta. We really appreciate all the support, particularly if you have ...
By subscribing, you agree to the High Fidelity Terms of Service

